Wednesday, October 28, 2015

The SSL certificate for this target is not supported.

How do I add SSL to my Site?

OVERVIEW: Customers who have an e-commerce WordPress site will need an SSL (Secure Socket Layer) certificate. An SSL certificate validates your website’s identity and encrypts all information sent to and from your website. When you have an SSL installed, your customers’ data will be fully secured for all financial transactions, usernames and passwords, and credit card information. 
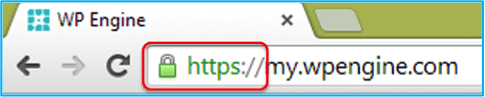
Websites running SSL can be recognized in the following ways.
  1. Lock Icon
  2. https://
SSL_example
SSL certificates must be purchased and established prior to being implemented on your site.
You can purchase an SSL certificate through WP Engine or a third party. This article will cover:
  1. What is an SSL certificate?
  2. How to obtain an SSL certificate.
  3. How to transfer an existing SSL certificate.
  4. Regarding Internet Explorer and SSL
What is an SSL Certificate?
SSL stands for Secure Socket Layer (SSL). SSL is a protocol that will encrypt a website’s data. This will assure your customers that what they are visiting is your site, not an imposter’s site that is pretending to be your site. Data that is transmitted via SSL is encrypted to ensure that it cannot be intercepted by any third parties. For a more in-depth guide on how SSL encryption works, please see our article regarding SSL Certificates.
HOW TO OBTAIN AN SSL CERTIFICATE
Before we get started there are a few things to understand.
  1. SSL Certificates can be purchased from WP Engine (Option 1) or a third party (Option 2).
  2. Before you can obtain an SSL certificate from WP Engine, your site must be live with us (that is, the DNS records for the affected domains must point to a WP Engine IP address).
  3. We sell two distinct types of SSL certificates (and can support all 4 of the available SSL varieties).
    • Standard SSL certificates cover one domain including both the www and non-www versions of that domain (so, for example, the SSL certificate will cover both www.yoursite.com and yoursite.com).
    • Wildcard SSL certificates cover www, non-www, and all subdomains (for example, subdomain.yoursite.com).
Option 1: Purchasing from WP Engine
Purchasing an SSL certificate through WP Engine is the easiest and most hassle-free way to get setup with additional security.  We partner with RapidSSL so that we can offer you the opportunity to not only purchase the SSL Certificates, but also have them automatically installed. If you would like more info about RapidSSL you can consult: https://www.rapidssl.com/learn-ssl/ WP Engine SSL certificate pricing Standard SSL certificates = $49 per year Wildcard SSL certificates = $199 per year You will be charged immediately through our billing system. Your purchase will be automatically renewed after 12 months. You will need to contact support if you wish to cancel the renewal. After 30-days, the fee for your SSL becomes non-refundable. For step-by-step help, use our interactive tutorial, “How Do I Buy An SSL Certificate“, in the User Portal.
How to Purchase an SSL certificate through WP Engine
  1. Log into the User Portal
  2. Choose the Install to which you want to apply the SSL Certificate
  3. On the right hand side of the screen, click on SSL
  4. Click on the “+ Buy SSL Cert” button when you are ready to configure and purchase your SSL Certificate
  5. Choose the domain which you want to apply the SSL Certificate. Note: The drop down list of domains will only show domains that are not already configured with SSL
  6. Choose Standard or Wildcard certificates
    1. Standard SSLs cover one domain, which includes www.example.com and example.com. However, if you choose a subdomain such as shop.example.com, the domain www.shop.example.com is not included.
    2. Wildcard SSLs cover example.com plus all subdomains (e.g. example.com, www.example.com, shop.example.com, and members.example.com).
  7. Click Next
  8. Fill out your contact information
  9. Read and agree to the Terms and Conditions
  10. A Confirmation window will appear. You will also receive a confirmation email sent to the address specified in the Contact Information window.
How to configure installed SSL Certificates
  1. All domains secured by SSL will be shown in the SSL menu of the install in question, in the my.wpengine.com User Portal
  2. Adding and Removing URL paths that will use SSL can be accomplished by expanding the domain under the “SSL Certificates” section: This is done using regular expressions, for more info see this guide
    1. In addition to using regular expressions to force paths to https, you can also choose to “Secure all URLs” which will force your entire site to HTTPS
  3. Install-specific settings will apply to all certificates that are configured per install. These options include:
    1. Force http:// for non-SSL pages – if checked, visitors who request https:// via their browser will be redirected to http:// for URL paths that are not configured to force SSL
    2. WP-Admin settings – determine what areas of your WP-Admin site should use SSL.

Option 2:  Purchasing or using an existing SSL from a 3rd party vendor

Note: 3rd Party SSL is not an option on a Personal Plan
If you would like to transfer an existing 3rd party SSL or purchase a new SSL from a 3rd party, we can help with that too. To begin this process, navigate to your User Portal and select and click the “SSL” link under the install in question.
There, you will click “Add existing 3rd party cert (CSR),” and fill out the required information. Your CSR will be generated and displayed on the next screen.
You can then give the CSR to the third party SSL Certificate provider. In turn, the third party provider will give you a SSL Certificate. You can then provide your certificate to WP Engine for installation on our servers on the upload step of the CSR creation wizard.
HOW TO TRANSFER AN EXISTING SSL CERTIFICATE
If you already have an existing SSL Certificate with a previous host, and have fully migrated your site to WP Engine, we can help you transfer your SSL Certificate over to our servers. In this case, please contact your old host and request your Private Key and certificates. The Private Key and certificates can then be placed into the folder titled “_wpeprivate” and provided to us through SFTP. Note: If you are unable to retrieve the private key from your old web host, we can create a new one for you. Simply follow the above instructions for creating a new CSR from the my.wpengine.com user portal. If you have your private key and SSL certificate, please create a new ticket; which will be found within your User Portal by selecting “Open a support ticket” from the Support tab at the top right. Please include the following within your ticket:
  1. Name of the install to which this SSL certificate should be applied.
  2. Folder name where the certificates and key are stored (this is usually “_wpeprivate”).
Regarding Internet Explorer and SSL
At WP Engine we serve our SSL’s through a process known as Server Name Indication. This is an efficient way to deliver SSL’s and works perfectly for most browsers, however when your site is accessed using Internet Explorer on Windows XP it may return the below error. This Connection is Untrusted / Certificate Error: You have asked to connect securely, but we can’t confirm that your connection is secure. Normally, when you try to connect securely, sites will present trusted identification to prove that you are going to the right place. However, this site’s identity can’t be verified.
Using a dedicated IP address will ensure that anyone using Internet Explorer on a Windows XP machine will be able to access your site securely and without error. A dedicated IP is only needed for Internet Explorer on XP, no other browser should have issues without a dedicated IP address. If you would like us to provide a dedicated IP for your site, please request this with your SSL setup ticket. For pricing information regarding dedicated IP addresses, please visit our Plans page.

Sunday, October 25, 2015

Download Amazon Prime Instant Video Titles to Android and iOS

Amazon this week made some waves by being the first subscription-based streaming service to make its content available for offline viewing on Android and iOS. This is great for those times when you want to watch something and don’t have an Internet connection, or are on a limited data plan.
Some Prime content has been available to download for offline viewing on Amazon Fire devices for quite a while already. And now Amazon is expanding that to include even more of its Prime customers.
Note that before you get started, you’ll need be an Amazon Prime subscriber which is $99/year. And you’ll also need the Amazon Video app installed on your Android or iOS device.

Download Amazon Prime Content for Offline Viewing on iPhone, iPad, or iPod touch

To get started, first you need to download the Amazon Video app on your iOS device and sign in with your Amazon account. Then, before starting to download anything, the first thing’ you’ll want to do is choose the video quality setting.
To do that, tap the Settings icon and then Download Quality. It’s set to Best by default, but I recommend choosing either Good or Better. Anything higher will take longer to download and use a lot more storage. This is especially important if you have a device with limited storage like an iPad Mini with 16 GB of storage.
Amazon Instant Video Quality
Now browse through you video collection and find something you want to download, and tap the download button for movies or the download icon next to TV shows.
download video
To find the content you’ve downloaded, tap Library > Refine > On Device.
library iOS
Something else you should keep in mind – even though there isn’t an Amazon Video app for Apple TV, at the time of this writing anyway, you can use AirPlay to send it to Apple TV and watch on the big screen.
Airplay to Apple TV

Download Amazon Prime Content for Offline Viewing on Android Devices

You won’t find the Amazon Video app for Android in the Google Play Store (yet), and there is a couple of ways to get it on your device. If you already have the Amazon Appstore installed on your Android device, you’ll find it there.
Or download the Amazon Underground app on your phone or tablet and follow the onscreen instructions. Amazon Underground was rolled out last week, and claims to offer $10,000 worth of free apps and in-app purchases.
Android Underground Android
After Amazon Underground is installed, search for Amazon Video and install the app. Launch it, and then log in with your Amazon credentials. Just like with the iOS app, you want to select the quality of the video downloads. To do it, tap the hamburger menu (three horizontal lines) and go to Settings > SD Download Quality. You’ll have the same options: Good, Better, and Best. You can also choose to have it ask the type of quality each time you download a video.
amazon Instant Video Android
Browse to the TV show or movie you want to download, and tap the download button for movies or the download icon next to TV shows.
amazon video Android
Now you can watch your favorite shows and not have to worry about finding a Wi-Fi connection, spotty cell coverage, or getting a huge bill for going over your data cap.
Amazon X-Ray IMDB
At the time of this writing, this feature is only available in the US, UK, Germany, and Austria.
Another thing to keep in mind is that not everything will be available to download and you won’t see a download button. Everything depends on the agreement Amazon has with the content creators…but of course all Amazon original programming will work.

Create a Windows 10 USB Bootable Flash Drive (Updated)

Usually when we cover creating bootable USB drives for Windows, we recommend the Windows 7 USB/DVD Download Tool (time to update that name Microsoft), but I’ve had some problems creating one and started looking for a different option.
So this time around, I thought I would try the free utility called Rufus. Here’s a look at using it, and in the end, I actually had a faster experience using it than the older Microsoft tool.
Update 7/29/2015 (Windows 10 Day): To get the ISO for the official release of Windows 10, head to this Microsoft page and download the 64 or 32-bit version of the media creation tool. It will allow you to upgrade your Windows 7 SP 1 or Windows 8.1 PC, or download the ISO to use later for a clean install.
For more on that, read our article: How To Download Windows 10 ISO for a Clean Install

Create Windows 10 Technical Preview USB Drive

First of all, make sure you download the Windows 10 Technical Preview by joining the Windows Insider Program as explained in this article. Also, make sure you’re using a USB drive that is at least 4 GB for the 32-bit version and 8 GB for the 64-bit version.
One of the first cool things about Rufus is that no installation is necessary, which means you can stick it on a network location, or another external drive to run it. When you run it, setting it up is simple. Select the USB drive you want to use, select your partition scheme – it’s worth noting that Rufus also supports a bootable UEFI drive.
Then select the disc icon next to the ISO drop-down and navigate to the location of your official Windows 10 ISO.
Rufus
After that click Start and you should be good to go, within minutes. If you want to be extra careful, check the option to check device for bad blocks. I didn’t do that and my bootable drive turned out fine.
Rufus Creating Bootable Drive
In my experience, using the older USB 2.0 port and drive, it actually took less than five minutes to create the drive. If you use a USB 3.0 set up, I would love to know how fast that works!
Anyway, after it’s created you can go ahead and install the Windows 10 Technical Preview on a spare computer.
Let us know what you think of this tool over Microsoft’s Windows 7 USB/DVD Tool, for me, I am going to continue to use Rufus – at least until Microsoft updates or recreates a new utility – if it does at all.
And yes, of course, you can use this to create other versions of Windows or a Linux distros from an ISO you can.

Create bootable USB drives the easy way

Rufus

[rufus icon]

Create bootable USB drives the easy way
[rufus screenshot]
Rufus is a utility that helps format and create bootable USB flash drives, such as USB keys/pendrives, memory sticks, etc.
It can be especially useful for cases where:
  • you need to create USB installation media from bootable ISOs (Windows, Linux, UEFI, etc.)
  • you need to work on a system that doesn't have an OS installed
  • you need to flash a BIOS or other firmware from DOS
  • you want to run a low-level utility
Despite its small size, Rufus provides everything you need!
Oh, and Rufus is fast. For instance it's about twice as fast as UNetbootin, Universal USB Installer or Windows 7 USB download tool, on the creation of a Windows 7 USB installation drive from an ISO. It is also marginally faster on the creation of Linux bootable USB from ISOs. (1)
A non exhaustive list of Rufus supported ISOs is also provided at the bottom of this page. (2)
Thailand

 >> Download <<

Last updated 2015.09.28:

How to Install Windows 10 on Your PC

If you haven’t installed Windows 10 on your PC before, you’ll have to perform an upgrade first before you can clean install. If this doesn’t make any sense, that’s because Microsoft never makes licensing easy, even when there’s a free version. Once you’ve performed the upgrade and activated your Windows 10 upgrade on a PC, Microsoft will associate your unique hardware ID with an activated Windows 10 license, and you can reinstall as you see fit. But not until you’ve upgraded Windows 7 or 8 to Windows 10 and then activated.
Just keep in mind that Windows 10 is only provided for free as an upgrade. You can’t clean install it, there are no keys at this point. Unless you use our clean install workaround.
For posterity, here are all of the installation steps if you’re booting from a flash drive, although you could just remember the word “Next” and get through it fine. Just remember to choose Upgrade when prompted unless you’ve previously upgraded and activated Windows 10 on this computer.
When you first boot the computer you’ll see a screen like this one:
Click Next and you’ll be taken to the Install now button screen. Which obviously you should click.
At this point you can choose whether you want to upgrade Windows or install a new custom install. Since we’re recommending that everybody install into a virtual machine or on a test PC, you should select Custom here.
Update: You should probably choose to Upgrade the first time, because the license key might not work otherwise.
At this point you’ll need to pick where to install Windows 10. You might need to delete or create a partition, but if you are using a virtual machine, you can just click Next.
And now it will install.
Once the PC reboots again, you’ll be able to select the settings like whether Windows Updates are enabled (they aren’t allowed to be disabled in the preview). We’d recommend just using the express settings if you are using a test machine — use Custom if you’re really going to use the computer.
And now you can sign into your Microsoft account. We’d recommend using a Microsoft account because otherwise you won’t be able to use half of the new features and you may as well use Linux or stick with Windows 7.
If you’ve setup your account properly you’ll probably be asked to verify it in the middle. We excluded those steps from this article, but they are pretty simple.
Now you’ll be asked how to setup the PC. Since we wanted to test everything as a new computer, we chose to set it up as a new PC instead, but you could copy all your settings from another computer if you wanted to.
Want to use OneDrive? It’s nicely integrated into Windows, so we just left it alone.
And now a colorful screen that tells us things are happening.
And finally, we are at the desktop! Note that the desktop on the full release of Windows 10 looks different, and this screenshot came from a pre-release version.

Windows 7 Ultimate Free Download ISO 32 / 64 Bit

Windows 7 Ultimate Free Download ISO file from here which works for both 32 bit and 64 bit. Download Windows 7 Ultimate Official Untouched ISO free version.
windows 7 ultimate free download iso 64 bit and 32 bit
Windows 7 operating system is still considered industries best. This can be imagined in such a way that some windows 7 lovers are downgrading their new computer from windows 8 to windows 7 ultimate. So if you want to optimize pc speed and get best performance then do install fresh windows 7 ultimate iso.
Windows media center enhanced the movies and photos slide show functionality of windows 7 ultimate. Download windows 7 ultimate iso free and enjoy playing HD movies on windows media center. You can easily play a song while images slide show in media center. The image effects are amazing and exciting. If you need a software to play all kind of media on windows 7 then download and install free player. When you install this you get option whether you want 32 bit or 64 bit. Please choose it based on your computer architecture.
download windows 7 ultimate iso 64 bit and 32 bit free
You can also Download Windows 7 All in One ISO if you are interested in multiple editions in single ISO. Desktop navigation is super fast and smooth in windows 7 ultimate version. Windows 7 firewall is more secure with inbound and outbound firewall rules. You can build application on cloud windows 7. You can also uninstall windows 7 to upgrade to latest Windows release. If don’t want to download & install Full Operating System, You can install windows 7 virtual machine. Windows 7 widgets are useful for productivity. There is huge Microsoft tech support for windows 7. You can Download Windows 10 ISO as well which is latest release from Microsoft.
Windows 7 Ultimate Features and Review
Start application faster Swift Internet Explorer with Enhanced Web Connectivity Ease of Network Creation Remote assistance windows 7 is enhanced Complete backup and Recovery Solution, in case you need 3rd party recovery program then try free data recovery software.
windows 7 ultimate features and review
Detailed Windows 7 Features are listed on official Windows site.

Windows 7 Ultimate Free Download ISO 32/64 Bit

Well still searching how to download windows 7 ultimate version iso free? Click on below button to download free windows 7 iso 32 bit and 64 bit. This includes Windows 7 Ultimate Official Untouched ISO with SP1 Updates as well.

32 Bit

64 Bit

How To Install Windows 7 from USB Pen Drive

I have already posted a tutorial to install window 7 from USB. Once you create boot able flash drive, Then plugin into computer and boot from USB. Let me know if you hit any issues while installing Microsoft windows 7.
This Post Was Last Updated On: September 18, 2015 By Author: Fatima Afridi

Windows 7 free download.

আপনার এন্ড্রয়েড ফোন থেকে অসাবধান বশতঃ জরুরী ছবি/ভিডিও কি Delete হয়ে গেছে তাহলে ফিরিয়ে আনুন সবকিছু মাত্র ২ MB এর App দিয়ে।

Dumpster
আসসালামু আলাইকুম।
প্রিয় বন্ধুরা, আপনারা সবাই কেমন আছেন, আশা করি খুব ভাল আছেন এবং আগামি তে যেন সব সময় ভালো থাকেন এই কামনা রইলো।
Like Trickbd On Facebook
আমরা অসাবধান বশতঃ ভুল করে কিছু কিছু ফাইল delete করে দেই, বা অন্য বন্ধু না জেনে delete করে দিল কিন্তু delete করার পর মনে হয় delete করা ভুল হইছে। তাই আজ আমি আপনাদের জন্য নিয়ে আসলাম পিসির মত ১টি Apps এই Apps দিয়ে আপনি delete করা File উদ্ধার করতে পারবেন।
কাজের ধারাঃ প্রথমে এখান থেকে Apps টি ডাউনলোড করে install করুন।
Filename: Dumpster.apk
Size: 1.9 MB
Click Here To Download
তারপর চালু করুন। এবার দেখবেন আপনার ডিলেট করা গান/ছবি/ভিডি দেখতে পাবেন।
ad1
এবার যেটি ডিলেট করেছেন সেটি সিলেক্ট করে Restore বাটনে ক্লিক করুন তাহলে ফাইলটি যে জায়গা থেকে ডিলেট করা হয়েছে সেখানে চলে যাবে।
ad2

কেউ যদি আপনার মোবাইল এর SMS লুকিয়ে লুকিয়ে পড়ে,সাথে সাথে ধরা পড়ে যাবে…. সাথে সাথে ছবি উঠে থাকবে

আজকে যেই অ্যাপস
টি শেয়ার করবো তার নাম SMS
Locker।
এই অ্যাপস টি আপনার
ফোনোর SmS Lock
করে রাখতে পারবেন। অ্যাপস
টি আপনি পিন কোড হিসেবে সেট
করে খাখতে পারবেন। সব
চেয়ে মজার বিষয় হলো যখন কেউ
আপনার SmS
পড়তে যাবে সাথে সাথে তার
ছবি উঠে যাবে
নিচ থেকে App টি নামিয়ে নিন।
Messege Locker Apk
নিচে দেখুন।
শুধু Sms ই না। আপনি চাইলে Whats App Gmail
Etc এর Sms গুলাও Lock করে রাখতে পারবেন।
নিচ থেকে App টি নামান।

★★Click Here To Download


সবাইকে ধন্যবাদ।

Android এর screen on off করুন আপনার ইশারায় । আর power বাটন এর প্রয়োজন হবে না ।

Android phone এর নতুন software এবং নতুন fetcher ।
এই Software দিয়ে আপনি আপনার ইশারা করে Phone এর screen on এবং off করতে পারবেন ।
Screen lock apk 2.2mb

Image result for lock phone
দেখেনেওয়া যাক এর fetcher সমুহ-
You can turn on/off the screen your device don’t need power by many way below:
*** DOUBLE TAP on Status Bar to Screen OFF***

***SHAKE SENSOR***
– Shake to Screen ON
– Shake to Screen OFF
– Recognizes when device in the pocket

***PROXIMITY SENSOR***
– Swiping over Proximity Sensor to Screen ON/OFF

***SMART COVER***
– Proximity Smart Cover feature for user using Flip Cover (If you use a phone case with cover, just close the cover to turn screen off. and open the cover to turn screen on).
– So with Smart Cover feature you just put the phone in your pocket to turn screen off, and take the phone out from your pocket to turn screen on.take it out of the pocket the screen auto turn on.

***GRAVITY SENSOR***
– When device on hand = Screen ON
– When device face down or in the Pocket = Screen OFF

***Suggestions***
– Double Tap on Status Bar to Screen OFF
– Shake to turn off, use the proximity sensor to open the screen to the most comfortable and most effective.
– When only opening screen features with the proximity sensor when taking the phone out of the bag itself on the screen.
– Besides you can very much for the way how to shut off by different types of sensors.

*** IMPORTANT NOTE ***
Unfortunately in some devices, the accelerometer sensor cannot be used when the screen is OFF so you can’t turn on screen by feature 1 and 3.But if you checked option for device do not turn on the screen, you can use Proximity or Smart Cover feature to turn on/off the screen.
Check your device on link:
saltwebsites.com/2012/android-accelerometers-screen-off
How to uninstall app :
You can click on Uninstall button,

Size : 2.2M
Current Version : 2.9
Requires Android : 2.3 and up

এক তুড়িতে খুলে ফেলুন এন্ড্রয়েড ফোনের BLOCK প্যাটার্ন লক

সালাম নিবেন আমি লাভলু হোসাইন এটি আমার চার নম্বর টিউন আসুন কাজের কথায় আসি
প্রথমে SD CARD খুলবি তারপর ফোন্টা বন্ধ করবি তারপর পাওয়ার বাটন এবং ভলিউম নিচের বাটন চেপে ধরবি একসাথে দুইটাই তখন ফোনটায় অনেক লেখা আসবে তারমধ্য থেকে SELECT করবি >Wipe data/factory reset(এই সিস্টেমে নিয়ে আসার পর পাওয়ার কি চাপপি চাপলে ওকে সিলেক্ট হবে)
AND THEN, অনেক লেখা আসবে তার মধ্য থেকে এইটা সিলেক্ট করবি
>>Yes(delete all user data)(এই সিস্টেমে নিয়ে আসার পর পাওয়ার কি চাপপি চাপলে ওকে সিলেক্ট হবে)
এখন আরেকটা স্টেপ আসবে ওখান থেকে অনেক লেখার মধ্য থেকে এইটা সিলেক্ট করবি
>>>Reboot system now(এই সিস্টেমে নিয়ে আসার পর পাওয়ার কি চাপপি চাপলে ওকে সিলেক্ট হবে)
এখন ফোনটা নিজে থেকে কিছু কাজ করবে
একটু পর দেখবি ফোন অন হয়ে গেছে আর জাদু দেখবি আর আমায় একটু স্বরন করবি
বি:দ্র অপশন চেন্জ করতে VOLUME UP,DOWN কি ব্যবহার করবি এবং সিলেক্ট করতে POWER KEY.

অরজিনাল স্যামসাং চেনার সহজ উপায়।


বিভিন্ন বাজার এবং অনলাইন কেনাকাটার ওয়েবসাইটে দেদারসে বিক্রি হচ্ছে স্যামসাংয়ের নকল স্মার্টফোন। দামি স্মার্টফোন গুলোর নকলই মূলত দেশের বাজারে ছড়িয়ে পড়েছে। বিশেষ করে অ্যাপলের আইফোন এবং স্যামসাংয়ের বিভিন্ন মডেলের নকল ফোন প্রকাশ্যে, এমনকি নকল ঘোষণা দিয়েই বিক্রি হচ্ছে। নকল হওয়া স্মার্টফোনের ক্ষেত্রে স্যামসাংয়ের ফোনের সংখ্যাই বেশি। তবে সনি ও এইচটিসির দু-একটি মডেলের স্মার্টফোনের নকলও বাজারে দেখা যায়।
নকল স্যামসাং ফোন চিনবেন যেভাবে
পর্দার চারপাশে একটি কালো আকৃতির খালি অংশ থাকে।
আসল স্মার্টফোনের হোম বাটনটি পর্দার নিচে খুব কাছাকাছি থাকবে। নকলগুলোতে একটু নিচে থাকে, যা খেয়াল না করলে বোঝা যায় না।
নকল ফোনে স্যামসাংয়ের লোগোতে নখ বা অন্য কিছু দিয়ে আঁচড় কাটলে সেটি উঠে যায়।
নকল স্মার্টফোনের প্যাকেটের সঙ্গে সাধারণত একটি ফ্লিপ কভার বিনা মূল্যে দেওয়া হয়, যা আসল ফোনের সঙ্গে থাকে না।Image result for samsung mobile
ওপরের পদ্ধতিগুলো প্রয়োগ করেও যদি বুঝতে না পারেন যে সেটি আসল না নকল ফোন সে ক্ষেত্রে ‘এলসিডি টেস্ট’ করে নিতে পারেন। ফোনটিতে *#০*# চাপুন। ফোন আসল হলে সঙ্গে সঙ্গে পর্দায় এলসিডি টেস্ট দেখা যাবে। নকল সেটে এটি কখনোই আসবে না।
আসল ফোনে *#১২৩৪# চাপলে ভার্সন এপি, সিপি ও সিএসসি সিরিয়াল নম্বর, *#০ *# চাপলে জেনারেল টেস্ট মোড এবং *# ০২২৮# দিয়ে ব্যাটারি স্ট্যাটাস দেখা যাবে। নকল ফোনে এসব ‘কোড’ কাজ করে না।

👓 software এর মাধ্যমে নিয়ে নিন ফোন নাম্বার ।

Power-Grid-app
আর কথা বাড়াতে চাই না নিচ থেকে 
Download করে নিন
Assadullah Al Mostazi

Android এ যাদের Bangla Font সমস্যা তারাই দেখুন না নিলে মিছ

Unnamed
Android এর যে App টি নিয়ে কথা বলব তা
সম্বন্ধে হয়তো অনেকেই অবগত আছেন।
যারা জানেন না তাদের জন্য। অনেকের সাধের Android Phone টি সব
ঠিকঠাক মত চললেও Bangla Font চিনতে
পারে না৷ ফলে অনেক ভোগান্তি পোহাতে
হয়৷ কারন, আমাদের মনের ভাব প্রকাশে
অহরহ বাংলা শব্দের ব্যবহার করতে হয়৷
এই বিষয়ে যারা ভোগান্তিতে আছেন, এই ছোট্ট App টি তাদের জন্য৷

এর সমাধানে App টি আপনার Devise থেকে
ইনস্টল করুন৷ এবার আপনার ফোনের
Settings থেকে Display তে যান৷ Font
Style থেকে Bangla Font টি Select করুন৷
ফোন Restart চাইলে Restart করুন৷
আপনি ঝামেলা থেকে মুক্তি পেলেন৷ এখন আপনার ফোনে সুন্দর ভাবে Bangla Font
গুলো দেখতে পাবেন৷ মনে হয়, App টি ব্যবহারে উপকৃত হবেন।
অ্যাপ ডাউনলোড লিংকঃ
1.bp.blogspot.com/-pgh9BVQAwLo/VEel-j4FNoI/AAAAAAAABDE/7ip8DQJTPVg/s1600/Download-button-now.png

সবচেয়ে কম দামে 4G Phone। তাও আবার ডুয়েল সিম এবং মেমোরি

Unnamed
আসসালামুয়ালাইকুম। কেমন আছেন সবাই ? আজ আপনাদের সাথে পরিচয় করিয়ে দেবো আমার জানা সবচেয়ে কম দামের 4G ফোনের। তাও আমার ডুয়েল সিমেই 4G Supported।
নাম:Lenovo A2010

Price6,800৳এতো কম দামে অন্য কোনো 4G ফোন আছে কিনা আমার জানা নেই। থাকলে প্লিজ টিউনমেন্ট এ জানাবেন।আসুন এবার দেখে নেই এই ফোনের Specifications।Specification১। Release date – August 2015 বুঝতেই পারছেন Brand New।২। Dimensions (mm)- 131.50 x 66.50 x 9.95৩।Battery capacity – 2000 (mAh)। দাম অনুযায়ি ভালোই।Display১। Screen size 4.5 Inches২। Resolution- 480×854 pixelsHardware১। Processor – 1GHz – quad-core২। Processor make – MediaTek MT6735৩।RAM – 1GB৪। Internal storage – 8GB৫। Expandable storage -Yes৬। Expandable storage up to 32 GB Camera১।Rear camera – 5-megapixel২।Flash – Yes৩।Front camera – 2-megapixelদাম হিসাবে চরম Software
Android 5.1 LollypopConnectivity*
Wi-Fi Yes*Wi-Fi standards supported 802.11 b/ g/ n*GPS -Yes*Bluetooth -Yes, v 4.00*NFC- No*Infrared- No*Wi-Fi Direct- No*MHL Out- No*HDMI- No*Headphones- 3.5mm*FM- Yes*Number of SIMs- 2* *SIM 1*SIM Type Micro-SIM*GSM/ CDMA GSM*3G -Yes***4G/ LTE- YesSIM 2*SIM Type Micro-SIM*GSM/ CDMA GSM*3G -Yes**

*4G/ LTE- YesSensorsCompass/ Magnetometer NoProximity sensor NoAccelerometer YesAmbient light sensor NoGyroscope NoBarometer NoTemperature sensor No

সিম্পনী ৩জি স্মার্টফোন ৩,৬৯০ টাকায় (Symphony Xplorer E6)

Unnamed
আজ স্মার্টফোন এর বিস্তারিত তথ্য নিয়ে হাজির হলাম খুব সল্পমূল্যের Android মোবাইল দাম মাত্র ৩,৬৯০টাকা|
এটি ৩জি নেটওয়ার্ক সাপোর্ট করে। এবার চলুন এর বিস্তারিত ফিউচার দেখে আসি। মডেল Symphony Xplorer E60।।।


★★★ Features
*Network Scope 2G, 3G
*Battery Type & Performance
Lithium-ion 1400 mAh
*Stand-by: Up to 150 hours
*Talk.time: Up to 4 hours
*Body & Weight 121 x 63 x 10 millimeter, –
*Camera Factors(Back) Flash light, up to 4x zoom
*Camera Resolution
(Back) 2 Megapixel
*Camera Resolution
(Front) 0.3 Megapixel (VGA)
Colors Available Black
*Display Size &Resolution 4 inches, *WVGA, 768 x 480 pixels
*Display Type Touchscreen
*Graphics processing unit
(GPU)Mali 400
*Memory Card Slot MicroSD, up to 32 GB
*Operating System Android KitKat v4.4.2
*Processor Single-core, 1 GHz
*RAM 512 MB
*ROM 4 GB
*Release date July 2015
*Sensors G-sensor, accelerometer (3D)
*SIM Card Type Dual SIM (regular SIM)
*USB MicroUSB
*Video Recording Yes
*Wireless LAN Yes, Wi-Fi Hotspot
*Other Features – Bluetooth, GPS, A-GPS, MP3, MP4, Radio, GPRS, Edge, Multitouch, Loudspeake

দেশে এলো স্যামসাং এর সবচেয়ে পাতলা ফোন Samsung A8!!!!

Unnamed
দেশে এল সবচেয়ে পাতলা গ্যালাক্সি ফোন!!!
================
দেশের বাজারে সবচেয়ে পাতলা
গ্যালাক্সি ফোন ‘এ৮’ উন্মুক্ত করেছে
স্যামসাং। ফোনটি পাঁচ দশমিক নয়
মিলিমিটার পুরু। এটিই স্যামসাংয়ের
সবচেয়ে পাতলা ফোন। পাঁচ দশমিক
সাত ইঞ্চি মাপের সুপার অ্যামোলেড
ডিসপ্লেযুক্ত এই স্মার্টফোনটি ধাতব
কাঠামোর তৈরি।
===============
স্যামসাং মোবাইল বাংলাদেশের
মোবাইল বিভাগের প্রধান হাসান
মেহেদী বলেন, ‘এ সিরিজ উদ্বোধনের
সময় চমকপ্রদ ডিজাইনের প্রতিশ্রুতি
দেওয়া হয়েছিল। এ৮ দিয়ে উদ্ভাবনী
বৈশিষ্ট্য নতুন মাত্রায় নিয়ে যাওয়ার
চেষ্টা করা হয়েছে। গ্যালাক্সি
পরিবারের সর্বশেষ সদস্য এটি। যাঁরা
স্টাইলের মোবাইল ফোন চান, তাঁদের
জন্য এটি।
=============

ফিচার:এ৮ স্মার্টফোনটিতে পেছনে ১৬ ও
সামনে ৫ মেগাপিক্সেলের
ক্যামেরা রয়েছে। স্বল্প আলোতে
উজ্জ্বল ছবি তোলার ক্যামেরাতে
রয়েছে রিয়েল টাইম এইচডিআর এবং এফ
১.৯ লেন্স। ৫ মেগাপিক্সেল
রেজুলেশনের এই ফ্রন্ট ফেসিং
ক্যামেরা ১২০ ডিগ্রি ওয়াইড
অ্যাঙ্গেলের সেলফি তোলার জন্য
উপযুক্ত। স্মার্টফোনটিতে অ্যাডভান্সড
সেলফি এর পাশাপাশি আলট্রা ওয়াইড
শট, জিআইএফ শুটিং মোড এবং অটো
সেলফি মোড-পাম ও ভয়েস সেলফি
আছে। স্মার্টফোনটিতে আছে ২ জিবি
র্যাম, অক্টাকোর প্রসেসর ও ৩২ জিবির
ইন্টারনাল স্টোরেজ। এর ব্যাটারি
তিন হাজার মিলিঅ্যাম্পিয়ারের।
নিরাপত্তার জন্য আছে ফিঙ্গার প্রিন্ট
সেন্সর।
কালো, সাদা, এবং সোনালি রঙে
এটি বাজারে পাওয়া যাবে।
বাংলাদেশের বাজারে এর দাম ৪৪
হাজার ৯০০। এক বছরের ইএমআই সুবিধাও
দিচ্ছে স্যামসাং।

Google Play store এ আপনার তৈরি করা Android Application আপলোড দিন।

গুগল প্লে স্টোর থেকে আমরা
সবাই কম বেশি আমাদের
এন্ড্রয়েড গ্যাজেট এর জন্য এ্যাপ
ইনস্টল করি অথবা ডাওনলোড করি
। কিন্তু আপনি চাইলেও পারেন
ঘরে বসেই গুগোল প্লে স্টোর-এ
আপনার তৈরি করা Game বা App
Upload করতে পারেন। সেটা
আপনি চাইলে Android দিয়েও
করতে পারেন। তবে পিসি
থাকলে পিসিতে করা ভালো।
যারা মোবাইল দিয়ে করবেন,
তারা Uc browser দিয়ে করবেন।
আর কম্পিউটারে fairfox বা chromo
বা Internet explorer দিয়ে করবেন।
প্রথমেই আপনার লাগবে একটি
গুগল একাউন্ট অর্থ্যাৎ একটি
জিমেইল একাউন্ট ।
কিন্তু যাদের Gmail নাই, তারা
খলে নিন।
এবার http://gmail.com এ গিয়ে sign
in করুন। এবার বের হয়ে আসুন>
এরপর https://play.google.com/apps/
publish এই লিঙ্কে ক্লিক করুন,
আপনি আপনার গুগল একাউন্ট
থেকে ইতিমধ্যে লগ আউট না হলে
লিংকটি সরাসরি ই
রিডাইরেক্ট হবে , অথবা লগআউট
হইয়ে গেলে আবার লগইন করে
নিন । এই লিংকটি আপনাকে
আরেকটি নতুন পেইজে নিয়ে
যাবে ,
যেটি দেখতে ঠিক এরকম এখানে লাইসেন্স Agreement এর
চেকবক্স এ ক্লিক করে নিন , এর অর্থ
হলো আপনি অ্যাপলিকেশন
তৈরি করতে চান এবং সেটিকে
পাবলিকলি প্রকাশ করতে চান ।
এগ্রিমেন্টের চেকবক্স ওকে করে
দিলে আপনি চলে যাচ্ছেন
Continue to Payment পেইজে ।
যেখনে গেলে আপনি একটি পপ
আপ পেইজ পাবেন । Start Now তে
ক্লিক করুন।
এটি আপনাকে আরেকটি নতুন
পেইজে নিয়ে যাবে যেখানে
আপনি একটি ফর্ম পাবেন । আপনার
ক্রেডিট কার্ড ইনফরমেশন ও
ডিটেইল ইনফর্মেশন এড করতে
হবে।

Featured Post

আপনার মোবাইলে HD কোয়ালিটি তে 50 + বাংলা ও বিদেশি চেনেল দেখুন কোনো ধরনের ঝামেলা ছাড়াই(২জি তে ও চলবে)

দরকার শুধু একটুখানি এম বি, তাতেই দেখা যাবে সব টিভি চ্যানেল। দেশীয় চ্যানেলগুলো তো থাকবেই, থাকবে বিদেশিগুলোও। শুধু তা-ই নয়, পাওয়া য...